Lumos
3D-Printed Longboard Nose Guard with Headlight
summary_
Lumos is a custom-made 3D-printed nose guard for my Antuna longboard deck. Designed primarily to protect the deck from chips and dings, Lumos is also equipped with a LED headlight for enhanced night riding safety.
Year 2017
Duration of Service Ongoing
My Role Designer, Fabricator
Software SOLIDWORKS, MakerBot Desktop
Hardware MakerBot Replicator 2
background_
The second board I owned after Velox, the DIY Electric Skateboard I designed, was the Antuna deck from Lush Longboards. I loved every bit of it, from the overall shape of the deck all the way to the tacky graphics on its belly. This was why my heart sank when one day I failed to stop the board in time, causing it to bump onto a pebblestone step, which resulted in a dent on the wood.

As I gazed at the outcome of that unfortunate incident, I couldn’t help but wish I had gotten a nose guard for the deck earlier. But it was not that simple; the unique shape of the deck meant there was virtually no off-the-shelf nose guard I could have bought, not to mention that most of them were, to me, overpriced. For some people, the first ding on an otherwise pristine deck was akin to overcoming the activation energy of a chemical reaction, making subsequent dings more bearable. However, that was not the case for me.
Thus, with a small ding on the front nose and a somewhat roughed up rear as well (as skateboarders/longboarders often hit the rear on the ground when vertically holding the board), I fired up SOLIDWORKS on my laptop and began designing a custom set of front and rear nose guards to be mounted on Antuna.
To design and fabricate a set of custom-made nose guards for the Antuna longboard deck.
THE GOAL
research_
With the ability to design something custom came the desire to augment the nose guards beyond just providing protection against future dings. The other item I had wanted to attach onto the longboard was actually some form of lighting for enhanced night riding safety. I had done some research before the ding occurred and found some really cool implementation in the form of a riser pad.
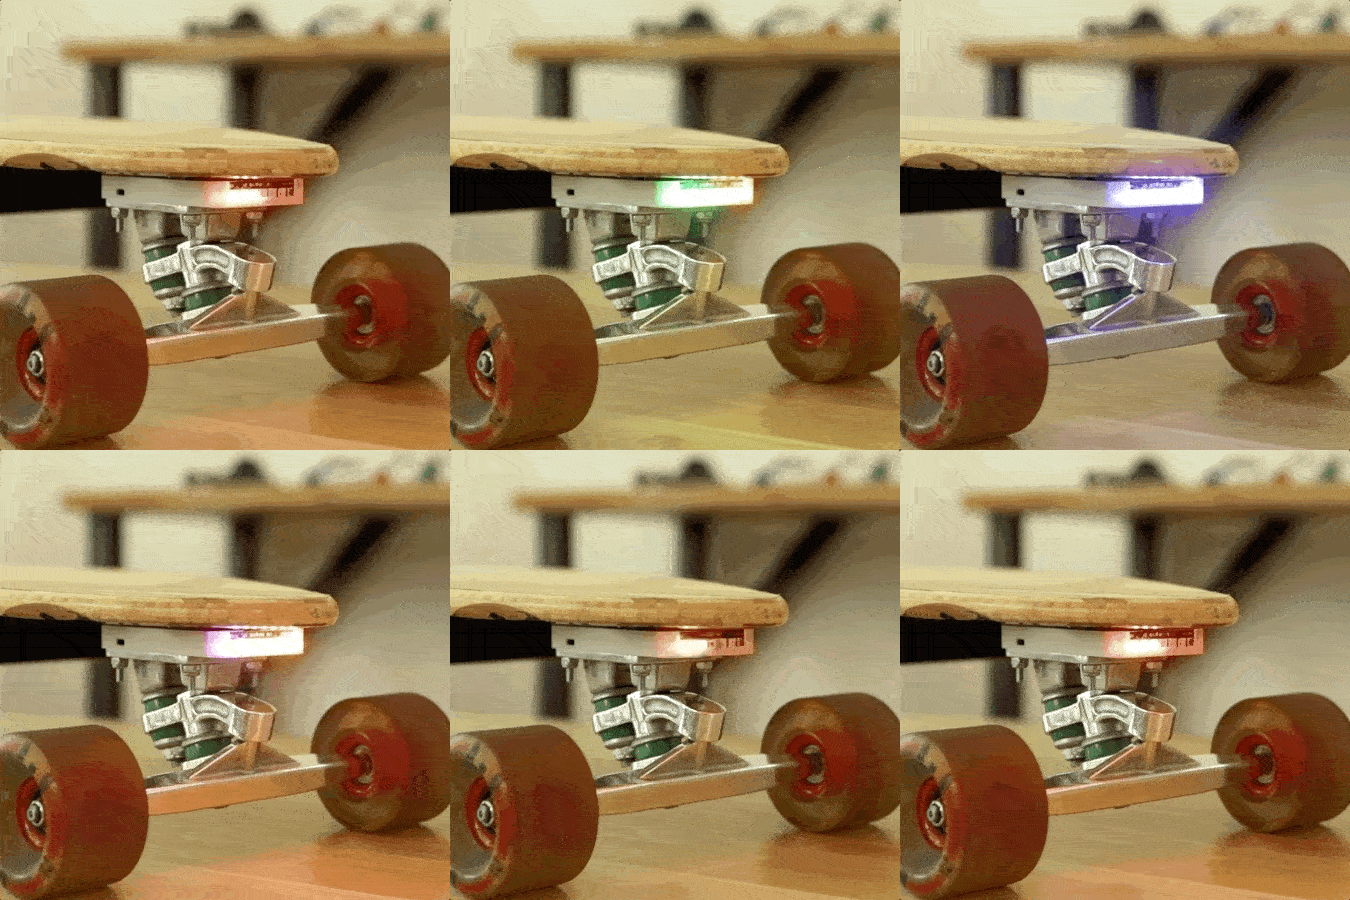
There were a couple of things that made me hesitant of adopting this approach, namely that (a) a riser pad increases the height of the ride which reduces stability and (b) I was not convinced that a 3D-printed riser pad would be able to withstand the impact of a person getting on a longboard in the long run. Once I got to designing the nose guard, however, I realized I could very well incorporate the idea of a lighting setup into the nose guard!
design considerations_
Unlike skateboard trucks that mostly come in natural kingpin setup, longboard trucks are generally designed with reverse kingpin setup for increased steering at the expense of higher ride height (which was why I was hesitant to add to the height even further with a riser pad). Longboard trucks also have a wider track width compared to skateboard trucks, which meant that there is more space underneath the deck that will not touch the wheel when turning. Both of these meant additional vertical real estate to work with underneath the deck when designing the container for the lighting electronics, as you can see from the available real estate diagram below.
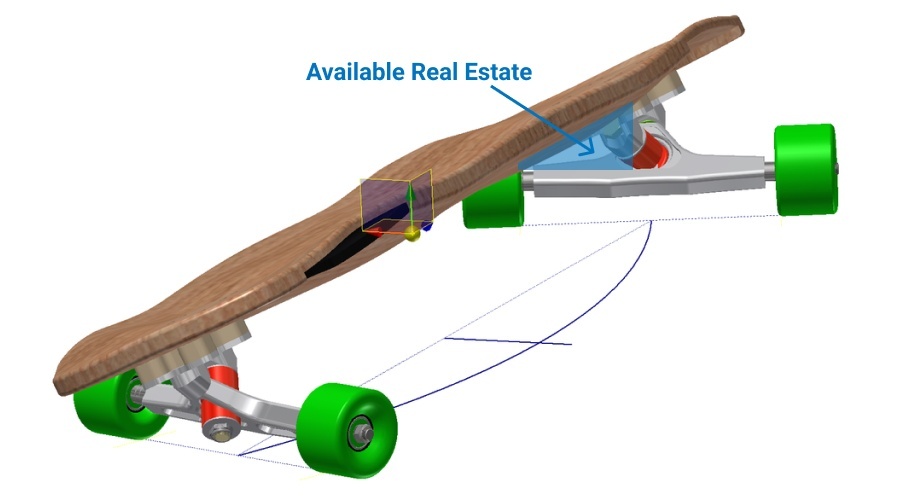
In the case of my longboard setup, that area came up to roughly a right-angled triangle with a 150mm base and 80mm height.
I had initially wanted to do the lighting setup for both the front and the rear. However, the tapered nature of the Antuna deck meant there wasn’t enough width at the rear for the electronics to be mounted on the nose guard without destroying the overall aesthetics of the longboard (I had to make the nose guard wider than the actual width of the deck, which would be unsightly).
As such, the rear nose guard design was just a simple tracing of the rear shape of the deck with two added mounting holes to be secured on two of the four screws holding the rear trucks. Subsequent elaborations will thus focus on the design and fabrication of the illuminated front nose guard.
parts sourcing_
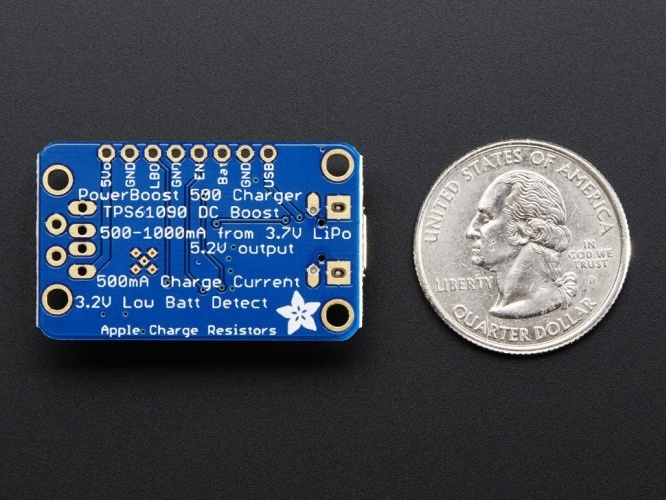
The first thing I did was to look for the smallest possible setup for the lighting. I went ahead with hacking a S$0.90 USB LED strip as the light source to minimize both power consumption and voltage requirement. The size was also ideal for the dimension of the front nose guard. To maximize the energy density of the power source, I decided to go with a 500mAh Single Cell LiPo battery. I also found a small toggle switch to regulate the activation/deactivation of the lighting setup. This brought about the final and toughest problem for me as a mechanical engineer: the need for a compact voltage regulator to step the 3.7V from the Single Cell LiPo battery to 5V.
I decided to tap into the expertise of my fellow engineers and DIY-ers, and one of them suggested using the Adafruit PowerBoost 500C. It very fell turned out to be the missing piece to the puzzle! At just about the size of a quarter (US$0.25), it even came with a MicroUSB input for charging the battery! Super neat!
CAD design_
I started by visualizing the layout of the electronic components; the LED strip up in the front center, flanged by the battery on one side, and the PowerBoost on the other. While this would require longer wires to connect the PowerBoost to the battery, it was not a problem voltage-wise as the PowerBoost’s output was calibrated to accommodate for longer wirings. The benefit of the reduced overall thickness of the nose guard was more important as every millimeter counts in preserving the turning radius of the longboard (the thicker the nose guard, the faster it will hit the truck’s axle while turning, and vice versa).
As the nose was roughly the shape of an isosceles triangle with curved sides, I went ahead with measuring the length of the base and then constructing the triangle before estimating the curvature of the sides. I also took note to ensure that there was enough gap for the nose guard to slot into the deck. This was rather difficult as the thickness of the deck was not even throughout, so I decided to add more buffer just in case. I also designed two mounting holes to be secured onto the screws holding the trucks, similar to the ones for the rear guard.
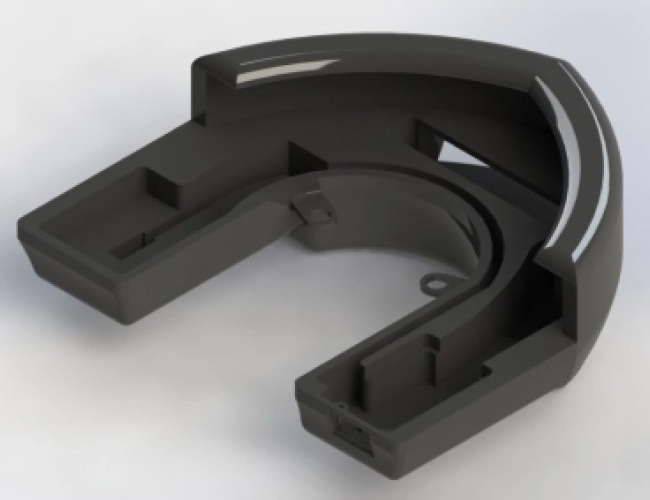
The battery slot was the one on the left, the PowerBoost’s on the right, and the top center slot was designed for the LED strip. There was a thin curved channel to accommodate the wires connecting the PowerBoost and the battery, as well as the PowerBoost and the toggle switch which would be housed inside the slit underneath the battery slot. There was also a cutout behind the PowerBoost slot to allow me to plug in the MicroUSB connector and charge the whole setup, as well as another small cutout for the LED charging indicator on the PowerBoost to remain visible. Once the layout was finalized, I CAD-ed two separate sets of covers for the electronics.
fabrication and assembly_
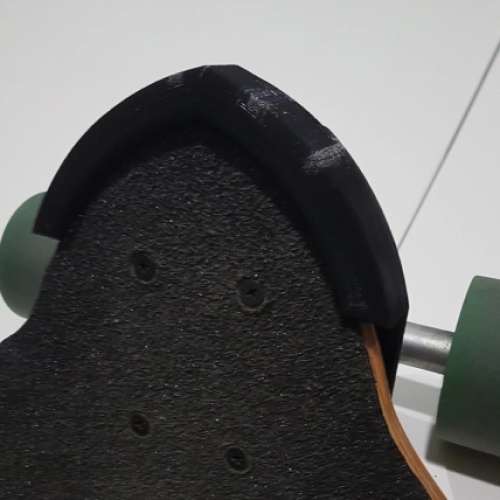
I printed the model above using a MakerBot Replicator 2 with black PLA filament and 20% filling. I was glad that the tolerance I provided on the CAD was good enough that I did not need to do any form of adjustments on the dimensioning. Best of all, the approximate curvature of the nose guard actually matched the deck’s quite well, and the nose guard essentially fit the deck really nicely.
As such, the assembly merely involved soldering the wires onto the components and placing all of them into the nose guard!
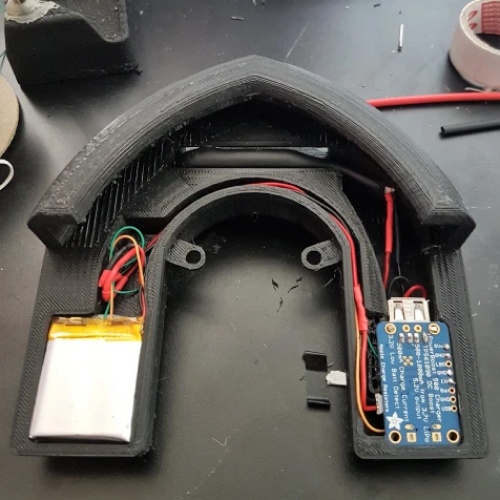
Once everything was tested and working, I aligned the covers and drilled through a couple of small holes for the screws. I initially planned on letting the screw teeth bite onto the plastic material of the holes, but it was not secure enough. Hence I had to use zip ties to better secure the covers. I ensured that they were black to match the color of the nose guard. I then went to mount the nose guard onto the deck, and voila!
evaluation_
Personally, I was very delighted with how Lumos turned out! Admittedly, the light emitted from the 5V LED strip was not bright enough to illuminate the road ahead much, but it was enough to alert oncoming vehicles or passers-by that a fast-moving longboard was nearby. I have yet to reach a point where I exhausted the Single Cell LiPo battery, but being able to charge it up without taking the whole setup off was definitely nifty!
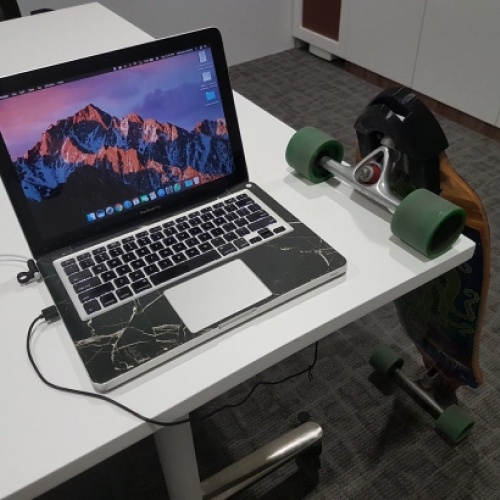
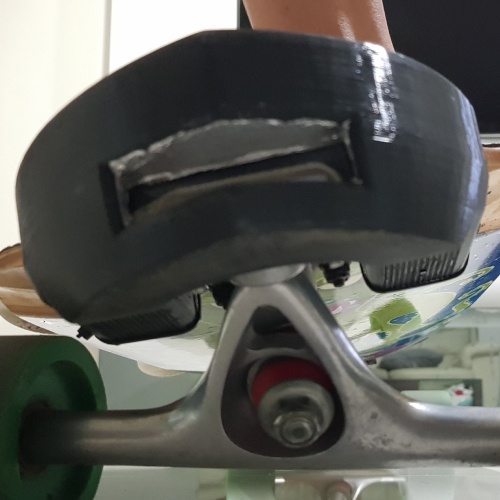
There was also zero chance of a “wheel bite” happening as Lumos was designed to be much narrower than the track width of the Paris Trucks I got. On a static wheel bite test, we can see that there was no possibility of Lumos touching the wheel of the longboard, and the remaining gap between the wheel and the deck was roughly equivalent to the gap between Lumos and the middle of the truck hanger. Even though longboarders generally exert more force when in motion, which results in a greater lean, the moment Lumos touched the truck hanger should be around the point of minimum turning radius for the longboard. Thus, the addition of Lumos onto Antuna would not impede the turning radius of the longboard much if any.
Lumos has thus been the sole protector of my beloved Antuna deck’s nose since 2016 and will continue to do so for many more years to come, given that I mainly use Antuna for short commutes and no tricks. Check out some of my night riding footage with Antuna below!

