RoverBot
Simple Customizable Differential Drive Wheeled Robot
summary_
RoverBot is a simple differential drive robotic kit designed for the Rolling Robot Workshop. The kit comes with a certain degree of customizability to allow workshop participants to experience firsthand the choices available in design and the importance of the rationale behind adopting the preferred choice.
Year 2017
My Role Designer, Fabricator, Arduino Programmer
Software SOLIDWORKS, CorelDRAW, Arduino IDE
Hardware GCC LaserPro Spirit GLS
background_
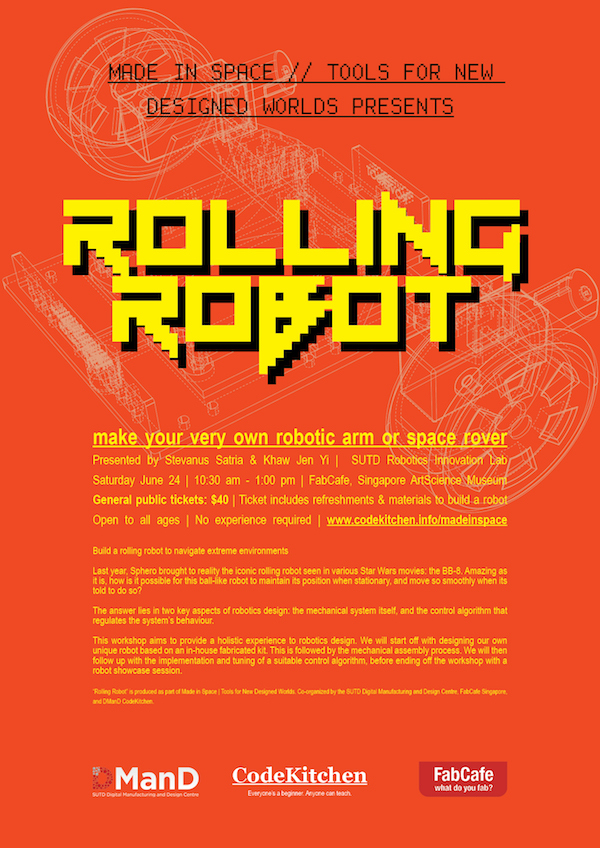
In 2017, the Singapore University of Technology and Design Digital Manufacturing and Design Center (SUTD DManD Center) collaborated with FabCafe Singapore to conduct a series of design workshops for the public. I was working as a Research Officer in the SUTD Robotics Innovation Lab (RIL) then, and one of the organizers approached me to conduct the opening workshop.

He knew that my coursework mates and I had designed a rolling robot, SALAMANDER, which was featured in several local and global platforms such as Discovery Canada’s Daily Planet show and Maker Faire European Edition 2015. He wanted me to bring forth and share the design process behind SALAMANDER as the main content of the workshop. Back then, rolling robots were a trend owing to the commercial success of Sphero. Hence, he felt that the participants would be able to understand the concepts shared better if the case study was a rolling robot.
I had initially planned on just sharing the design process of SALAMANDER. However, as we discussed more together with another organizer from FabCafe, we agreed that having a hands-on segment would be more beneficial to the participants. As such, I proposed the idea of having a co-instructor for the workshop. Upon getting from the two organizers I liaised with, I approached my co-worker, Khaw Jien-Yi, and we began the design of the robotic kits to be used for the workshop.
To design and fabricate a kit for workshop participants to apply the learnings from the session in a simulated environment
THE GOAL
research_
After several more meetings with the organizers, we understood that we would need to keep the total cost of the kits to S$1000. We quickly realized that it would be a stretch to give one kit to each participant if we use off-the-shelf microcontrollers such as Arduinos, especially given the possible need for additional servo/motor drivers. However, we wanted to include a holistic package in our workshop, which included the assembly, customization, and coding aspects of robot design. We discussed this in another meeting and agreed to have one kit assembled within a group of 3-4 participants instead. Not only would this be more feasible budget-wise, but it would also mimick a real-life scenario better. More often than not, a robot is designed not by a single person, but by a group of individuals handling different aspects of its design.
We also learned from the organizers that they planned to fill the class with around 40 individuals. Given the target group size, it meant we had to accommodate the budget for 10 kits. Each kit’s maximum cost is, therefore, S$100. Considering that we would not have any form of economies of scale, it would be impossible to fit this budget for a spherical rolling robot as it would require a more intricate drive mechanism, even for the simplest kart-in-a-sphere design. As such, we decided to leverage on the series’ “made in space” theme and started working on the Bill of Material (BOM) for two kit designs: a robotic arm and a wheeled robot. In the end, we settled for a Romeo v2 Board from DFRobot as the basis of our kit design. Even though it cost nearly half of our individual kit budget, we no longer needed to source separate motor/servo drivers. Furthermore, the Romeo v2 Board came with several programmable buttons that might come in handy when coding the robot’s functionality. Upon finding a local vendor who sold the board as well as very affordable options for the other essential mechatronics parts (servos, motors, mounts, wheels, batteries), we came up with the following Bill of Material that would fit the total budget of S$1000.

We shared this BOM with the organizers, and upon receiving their green light, began working on the design of the custom parts of each kit. Given the limited timeframe, Jien-Yi and I agreed that he would focus on the design of the robotic arm kit whereas I would focus on the wheeled robot kit. Hence, the following elaboration would focus on the design process of the wheeled robot kit named RoverBot.
parts design_
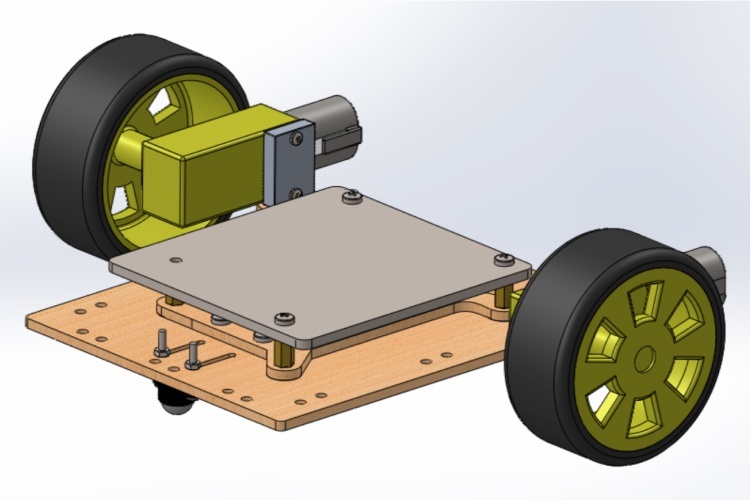
From the BOM above, it might be apparent that we were going with a differential drive wheeled robot design. The primary reasons were the simplicity of such a design as well as to reduce costs as much as possible. As the motor came with its own wheel and mount, all that needed to be designed were:
- A single base for the Romeo v2 Board and the battery
- Two connectors for the motor mounts to the base
- A single mounting place for the front ball caster
However, I would like to introduce some element of customization to the kit. Minding the limited amount of MDF we procured, I added additional cutouts on the base and designed parts for a spoiler and a bumper that could be mounted to the assembled robot. This added the following customization options to the kit:
- Placement of the wheels and ball caster
- Addition/removal of the bumper/spoiler and their placements
While the latter was purely cosmetic, the former might affect the stability and turning performance of the assembled robot.

Once the design of the parts was completed, I ensured that the slots and mounting holes would mate properly without any obstructions in SOLIDWORKS and rendered the assembled robot.
fabrication and assembly_
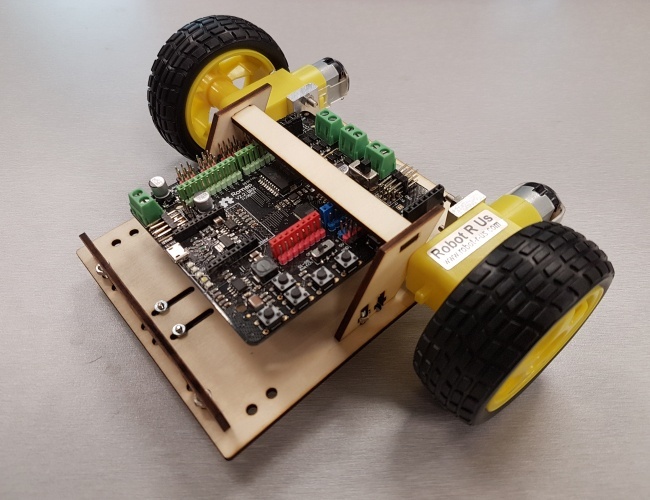
I added 0.2mm tolerance for the slots and mounting holes I designed and went ahead to fabricate the parts with some leftover 3mm plywood sheets I found in the lab. The laser cutting process took roughly 30 minutes for a single kit, but the design of the parts was fine as I was able to assemble the robot without any hassle.

As you can see from the above image, even the spoiler fit with just the right amount of tolerance against the motor mount! Whereas the spoiler seemed to obstruct some of the pins of the Romeo v2 Board, I ensured that those pins were not needed for this workshop.
Delighted with the outcome, I proceeded with connecting the electronics together and coding the Arduino sketch to test the robot’s functionality.
programming_
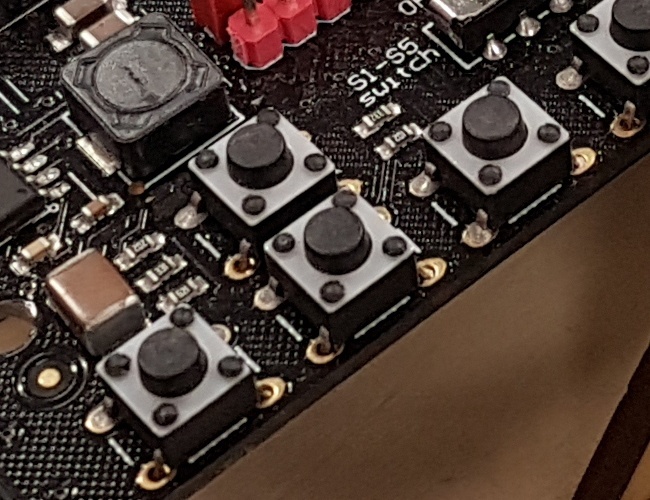
As mentioned previously, the Romeo v2 Board came with several programmable buttons to send input to the microprocessor. I thought that this would be handy in creating a program that was more interactive than just having the robot move on its own, which might be an underwhelming conclusion to the whole hands-on session.

Hence, I decided to instead write an Arduino sketch that would take the button presses as inputs for the robot to go forward, backward, turn left, or turn right. The duration of motion that came with each button press would be hardcoded and tuned based on the sample robot I had assembled. Should time permit during the workshop, the groups could then modify the sample sketch to tune their assembled robot themselves.
It did not take much time to write the first draft of the Arduino sketch, but tuning it to my assembled robot did take some time. You may find the complete Arduino sketch on my GitHub page HERE.
evaluation_
All in all, I was delighted with how the design turned out in terms of aesthetics and functionality. I believed that it provided just enough guidance to ensure that tangible results can be achieved within the stipulated hands-on session time limit, and just enough customizability to allow participants to practice the design thinking skills imparted during the workshop. You can take a look at how the prototype robot I assembled worked in the footage below:
We had originally thought of turning RoverBot and RoboArm into commercial kits. Unfortunately, the raw material cost of the workshop version was too high and while sourcing for alternatives, some of us had moved on to other projects. Hence, I decided to create a public repository to store and share all the design documentation and source material for RoverBot. You can find them HERE. Should you use it, please do credit myself, Jien-Yi, Sayjel Vijay Patel, Wouter A. van Hest, and Adeline Setiawan for the original design!

